: +86 15874211461

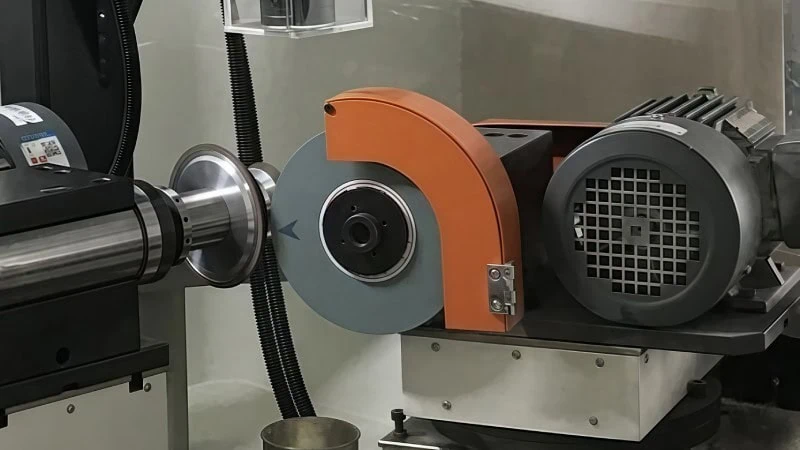
Quick answer: truing restores geometry and run-out; dressing restores the cutting face. Use a star dresser for bench and rough work and a sharp single-point diamond for precision. Start at 0.01–0.03 mm depth per pass for finishing, 0.05–0.1 mm for rough dressing, with a steady traverse and flood coolant. Dress when the face glazes, loads, loses form or finish drifts — not on a fixed calendar.
Related reading: Alumina wheel troubleshooting · Grit and grade selection · Diamond dressing tools · Diamond dressing tools guide.
Dressing, truing and conditioning
The three terms are often used interchangeably, but they describe different outcomes. A wheel can be true and still glazed, or sharp and out of round. Knowing which problem you have decides which tool and which pass you need.
| Operation | What it fixes | Typical tool | Result |
|---|---|---|---|
| Truing | Out-of-round, taper, run-out, lost form | Single-point or multi-point diamond, rotary dresser | Concentric geometry and correct profile |
| Dressing | Glaze, loading, dull grain, closed pores | Star dresser, diamond, dressing stick | Sharp, open cutting face |
| Conditioning | Final surface character after truing or dressing | Light diamond pass, fine stick | Controlled openness and finish |
On many jobs one diamond pass performs truing and dressing together. On form and production wheels the steps may be separated.
Why an alumina wheel needs dressing
Alumina is described as self-sharpening, but that does not mean it never needs attention. The grain fractures under load and the bond releases the worn fragment, exposing a fresh edge. That works well when the pressure, speed and grade are right. When they are not, the grain dulls faster than the bond releases it, and the face glazes. Or the pores fill with workpiece material and the wheel loads. Either way, the wheel stops cutting and starts rubbing.
Dressing resets that cycle. It removes the dull or loaded layer and opens the face so coolant can reach the grinding zone and chips can escape. It also corrects the geometry if the wheel has worn unevenly. A well-dressed alumina wheel cuts cooler, holds finish and uses less spindle power than a glazed one, even though it is slightly smaller.
Choosing the right dresser
| Dresser | Best for | Strengths | Limits |
|---|---|---|---|
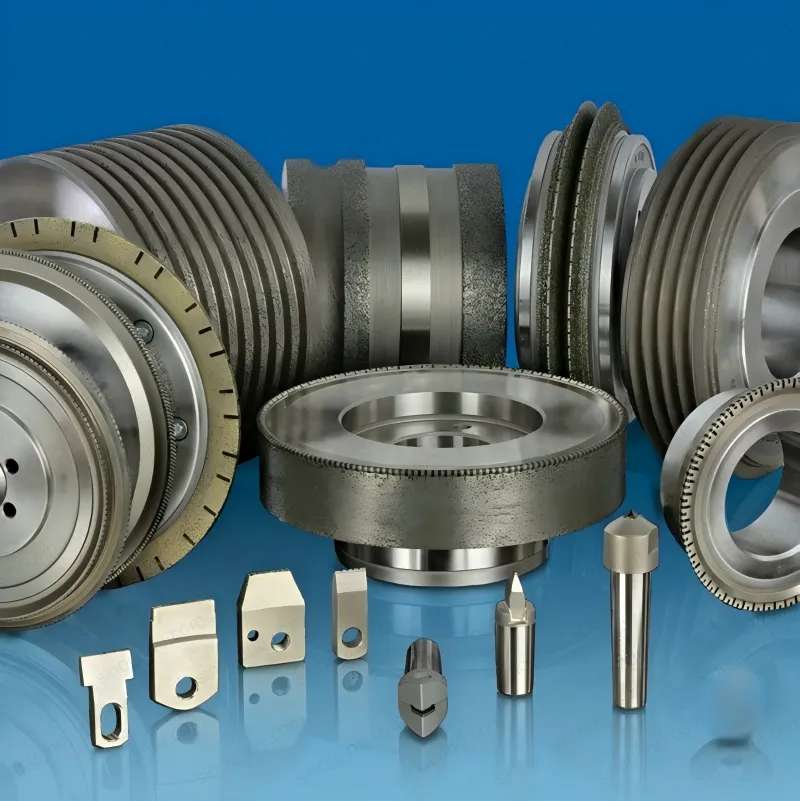
| Star dresser | Bench and pedestal grinders, rough opening, snagging wheels | Cheap, fast, forgiving; breaks glaze and loading quickly | Leaves a coarse face; not for precision form or finish |
| Single-point diamond | Surface, cylindrical, centerless and tool grinding | Precise, controllable, leaves a clean face; can true | Diamond can dull or chip; needs rigid mounting and coolant |
| Multi-point / cluster diamond | Production vitrified wheels, faster dressing | Faster traverse, more open face, longer tool life | Less precise form; needs higher rigidity |
| Blade / form diamond | Radii, angles and form grinding | Transfers a specific profile | Application-specific; fragile edges |
| Rotary diamond roll | High-volume form and CNC grinding | Fast, repeatable, long-lived; dresses while grinding on some machines | High cost; needs a dedicated dressing spindle and setup |
| Dressing stick | Small wheels, mounted points, light opening | Handy and inexpensive | Not for precision geometry; operator-dependent |
Match the dresser to the bond and the tolerance, not just to the wheel diameter.
For most alumina work, a single-point diamond is the default precision tool. It is simple, controllable and widely available. A star dresser is the right choice when the priority is to open a loaded face quickly on a bench wheel or a rough snagging operation. Rotary diamond rolls are a production investment: they make sense when the same form is dressed thousands of times and consistency is worth the capital cost.
Step by step: dressing an alumina wheel
- Stop and isolate. Stop the machine, isolate the power and fit the guard. Inspect the wheel for cracks, chips or damage before dressing. A damaged wheel is removed, not dressed.
- Mount the dresser rigidly. Clamp the holder close to the wheel to minimise overhang. Check that the diamond or star is sharp and that the tool is set at the correct angle.
- Start the wheel and coolant. Bring the wheel to speed and confirm coolant flow before contact. Never adjust the dresser by hand while the wheel is running.
- Touch off gently. Bring the dresser into contact slowly. Listen for a clean cutting sound; a squeal or polish usually means the depth is too light or the tool is dull.
- Traverse steadily. Use a consistent traverse across the face. Do not dwell at the edges or reverse in the cut.
- Take successive light passes. Continue until the face is clean, open and concentric. A uniform spark pattern across the face is a good sign.
- Finish with a spark-out pass. One light pass at the same traverse evens the face and removes the last of the loaded layer.
- Check and test. Stop, check run-out and balance, then grind a test part and inspect the finish before returning to production.
Depth, feed and speed starting points
| Parameter | Rough dressing | Finishing / precision | Notes |
|---|---|---|---|
| Depth per pass | 0.05 – 0.1 mm | 0.01 – 0.03 mm | Enough to remove the loaded layer; deeper wastes wheel |
| Traverse (lathe type) | 0.2 – 0.4 mm/rev | 0.1 – 0.2 mm/rev | Even traverse matters more than the exact number |
| Traverse (table type) | 200 – 400 mm/min | 100 – 250 mm/min | Slower on form and fine-finish work |
| Diamond angle | 5–15° drag | 5–15° drag | Point trailing slightly to avoid digging |
| Coolant | Flood | Flood | Clean fluid; aim at the contact |
| Total dress depth | 0.1 – 0.3 mm | 0.05 – 0.15 mm | Remove the damaged layer, no more |
Typical starting points for conventional alumina wheels. Confirm with the wheel and dresser manufacturer for your bond, wheel size and machine.
The numbers matter less than the principle: a sharp tool, a light depth and a steady traverse produce a clean face. A dull tool at any depth polishes the wheel and seals the pores, which is worse than not dressing at all. If the wheel still looks shiny after a pass, stop and inspect the diamond before adding depth.
Bench and pedestal wheels
Bench grinding is the place where dressing is most often neglected and most easily fixed. A star dresser is usually enough. Hold it firmly on the tool rest, bring it to the wheel lightly and move it across the face. Do not jam it in or use the side of the wheel as a grinding surface. For a pedestal grinder, a few seconds of light pressure every few hours of use keeps the wheel open and the finish consistent.
If the wheel has grooves or is badly out of round, a diamond dresser on a proper holder is a better choice. A star dresser follows the existing shape and will not correct a deep groove. Check the tool rest clearance and the guard before running.
Precision surface, cylindrical and tool grinding
On precision machines, dressing is part of the process, not a maintenance afterthought. The dresser is mounted on the table or a dedicated slide, the wheel is dressed at a controlled depth and traverse, and the same pass is repeated at the start of each batch or at a defined parts count. That repeatability is what keeps the first and last part the same size.
For cylindrical grinding, dress with the wheel running and the coolant on, then check the wheel for taper and run-out. For surface grinding, a cross-feed dress leaves a consistent face across the wheel width. For tool grinding, a light final pass is often enough to restore the edge without changing the form. In all three cases, the dresser should be rigidly mounted and the diamond sharp.
Conditioning the face
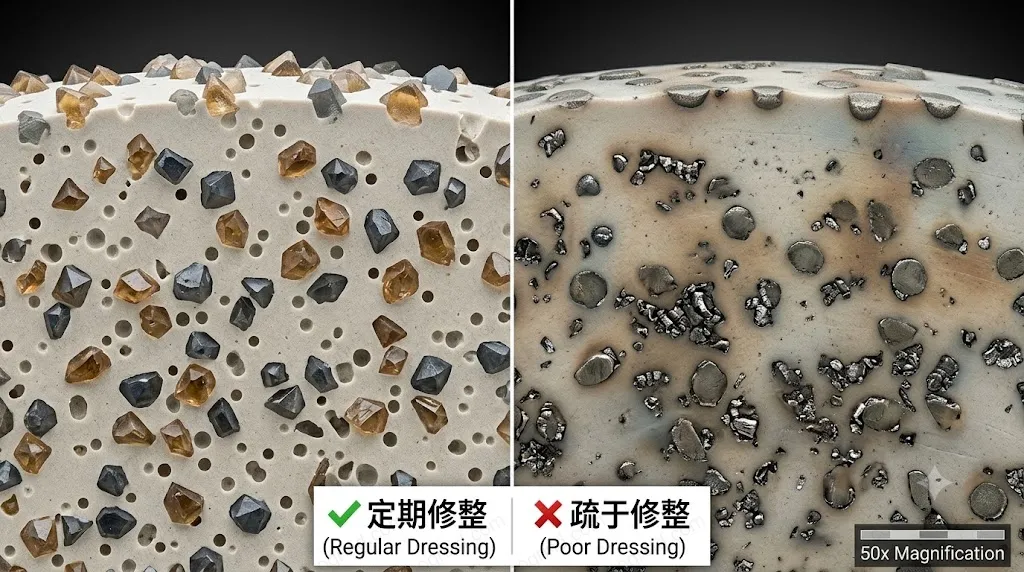
Conditioning is the final control of how open or closed the wheel face is. After truing, a light pass at a slow traverse leaves a finer face; a faster traverse or a coarser dresser leaves a more open face that cuts cooler and loads less. On alumina wheels, conditioning is usually just the last diamond pass, not a separate chemical or stick treatment. Abrasive sticks are mainly used on superabrasive wheels, where the bond needs to be opened without dulling the diamond or CBN.
If the wheel is burning on a finishing pass, try a slightly more open condition rather than a softer grade. If the finish is too rough, a lighter final pass may be enough. Change one thing at a time and inspect the part, not just the wheel.
How often to dress
There is no universal interval. In production, dressing is often triggered by a parts count, a spindle-load threshold, a finish check or a dimensional drift. In a job shop, it is triggered by what the wheel looks and sounds like. The signals below are reliable:
- Face appearance: shiny glaze, metal loading, polished bands or a worn edge.
- Spark pattern: sparks become small, bright and concentrated instead of a full, even curtain.
- Sound: the cut becomes quieter and higher-pitched, or starts to squeal.
- Finish: Ra drifts, chatter marks appear, or the surface starts to discolour.
- Dimensions: the part starts to drift or taper between checks.
- Spindle load: power rises for the same removal rate, a sign the wheel is rubbing.
- Heat: the part is warmer after the pass, or coolant steams at the contact.
Frequent light dressing is usually better than a heavy rescue pass. It keeps the wheel in its stable cutting range and avoids the temperature spike that comes with a fully glazed face. The trade-off is wheel consumption, so the right interval is the one that balances wheel life against finish, cycle time and scrap.
Coolant and safety
Dress wet whenever the process runs wet. Coolant controls heat at the diamond, flushes loose grain and prevents the dresser from loading. Keep the fluid clean; dirty coolant carries fines that can scratch the new face. Aim the stream at the contact point rather than the guard, and check flow before touching off.
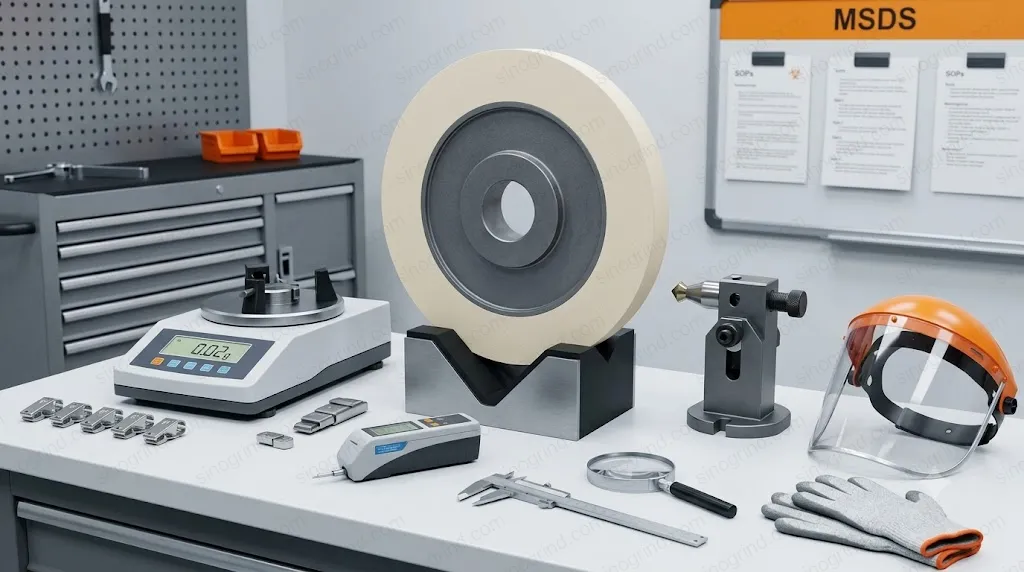
Safety is not optional. Fit the guard, wear eye and face protection, and keep hands away from the rotating wheel. Isolate the machine before adjusting the dresser or wheel. Check the wheel for cracks before mounting and never exceed the marked speed. Large wheels should be balanced after truing, and the machine should be run briefly with the guard in place before grinding.
Common mistakes
- Using a dull diamond. It polishes the wheel instead of cutting it, sealing the pores and causing burn.
- Dressing too deep. It wastes wheel, changes the geometry and can overload a small machine.
- Dressing too lightly. It does not remove the loaded layer, so the wheel looks dressed but still glazes.
- Traversing too fast. It leaves a spiral or ridged face and uneven contact.
- No coolant. It risks thermal damage to the wheel and leaves debris in the face.
- Dressing only when the wheel is already glazed. It forces a heavy pass and a temperature spike; light, frequent dressing is better.
- Using a star dresser on a precision form. It cannot hold the profile and may round the edge.
- Not checking run-out or balance afterwards. A freshly dressed wheel can still vibrate if it is out of balance.
- Dressing a damaged wheel. Cracks and chips are a replacement decision, not a dressing decision.
If dressing does not fix the problem, the issue is probably grade, coolant or speed. Work through the troubleshooting guide before changing the wheel, and use the bond selection tool if you are unsure whether the bond is the limitation.